Monday, November 11, 2013

LADIES PINTEREST POTLUCK: VOL. I


 OUR PINS CAME TO LIFE.

The Bar Spread.

      
          As crazy as times are these days, us ladies all crave a “girls night” every once in a while. That doesn’t always mean going out and dancing to our favorite songs. All of our occupations come with some sort of exhaustion, so we figured what would be the best thing? We came up with “ Ladies Pinterest Potluck”. Why “ Ladies Pinterest Potluck” you ask? Simply because, how may times have you pinned something, and haven’t gotten around to doing so? Possibly the majority of your pins, YES? Well it’s a yes for me, and for my gals, it was the same yearning to do so that it got us thinking, why not? Why not try at least once a month, have some sort of potluck that is inspired by the pins we pinned? It was a great way to get together,be on a smart  budget, relax, and FORCE us to make at least one of our pins! LOL! 


Soothed the Soul

     This was our (Kelly, Christy, and I) first “Ladies Pinterest Potluck”, so the activities of the night consisted of eating, drinking bold glasses of red wine, listening to jazz, and reading our tarot cards. We do plan on some future gatherings to add a, crafting activity, to take care of those “ DIY CRAFT PINS”.  I have a feeling that the more we do these, the bigger the group is going to get.

On the Menu:

  • Truffle Gruyere grilled cheese, on a multi grain croissant.
  • Prosciutto apple bites with herbed blue cheese.
  • Arugula salad with blackberries, bacon, blue cheese, and a balsamic glaze.
  • Baked Potato with bacon and swiss and cheddar cheese.
  • Baked avocado fries (more like nuggets), with a chipotle and cilantro cream dip.
  • Dessert: Deconstructed Apple Pie; Grand Marnier Spiced Roasted apples with vanilla mascarpone, and crushed chocolate gram cracker.
Total Prep/Cooking time: TWO hours.

Best made ready to serve (20min)
Christy, adding cheese and bacon.


Prosciutto Bites


Apples Roasting.


Truffle Grilled Cheese.


Dessert.
Waiting to be filled


          I encourage all of you gals, and gents to get a group going. See which dishes were a hit or a miss, and which were the easiest and the fastest! It’s never too late to spark the foodie/crafty person within. Encourage and inspire your group and hone your skills! Plus the holidays are around the corner, good to test out the dishes- don’t ‘cha think?
               Pinkies up,
                           C

Best picture of the night.
  P.S. We will be pinning to our board (CLICK HERE) for some inspiration recipe's. you can find the majority of the recipe's there. If there is something you see here and would like the recipe or steps, feel free to comment below! All the best... 
                           

Monday, October 21, 2013

DIY: BUTTERCREAM ROSETTES


I posted this quick video on Instagram and wanted to make sure everyone got a chance to see it (incase you don't have an iG account) .

A lot of friends and followers really love these stunning buttercream rosettes. Who would of known how easy it was?!

You will need ( just one star tip, but these are fun):


The Wilton 1M is ideal when wanting to cover large surfaces on your cake! 

If you have an iG account, feel free to follow C.C.'s at @carosconfections, or visit the public link online HERE

Here's the video below on my "quick tip: buttercream":


Pinkies up,
         Caro

Thursday, October 3, 2013

DIY: DESSERT TABLE (THE C.C.'S TEAM PROCESS)


  Dessert Tables Can Be Stress Free. 


              In my early years I've had my fair share of creating dessert tables for the family for the holidays, my favorite is Halloween. I love Halloween, and wish it was a week celebration! Lol! There's something about the colors orange and black and the amazing tulle and glitter decorations I get to play with. As the years have past my mother picked up on the whole "treats" station early on, before it became the trendy thing to do. With that, my sister and I, have picked up some helpful tips along the way and have been able to collaborate on some amazing dessert tables with some recent events, and for me a more successful outcome for my clients! 

   I don't care how many parties you have planned or decorated ect. In any production, it takes planing and timing for it to be an ENJOYABLE experience. We've all been there, life gets in the way and schedules conflict leaving you pressed for time. Here is a little cheat sheet timeline for your "DIY: DESSERT TABLE"


PRE-EVENT QUESTIONS:

  1. What type of celebration/event is this?
  2. Location of event, BOOK ASAP (3 MONTHS PRIOR)?
  3. Theme of celebration/event, does it work with the season?
  4. How many people will be attending, important for amount of sweets?
  5. Whats my budget and time frame until the celebration/ event? 


Once you have all those questions decided, it's time to peruse your local shops, craft stores, online stores, and of course inspirational websites-- COUGH COUGH PINTEREST ! lol.

    I personally, if time permits, start planning an event THREE months prior. It avoids impulsive shopping and less of a time crunch when it comes to decor. With my chosen theme in mind, I first do a little inspirational searching on the web from a variety of blogs to craft handmade vendors. Then I take it to the crafts store, like Michaels Craft Store, Joanne Fabrics, Anna's Linens- to the home stores like, Home Goods, Target, Marshalls, Pier One, T.J. Max, Sur La tab. I will go to all of these stores, and look around before I buy anything. Sometimes there are those items, that you know wont be coming back, on clearance, or even on sale. If you are feeling confident or it may be possible to return those items just incase. BUY IT!!! 

   Are there certain items, that you see at stores, that you say "How on earth  does it cost so much?" "I could make that". If you don't mind getting your hands dirty, or have kids that love to do just that, give them the glue and paint. It will be a nice family activity.Just be sure to repay them in a delicious meal. I mean that's what I would want from my parents- FOOD or CAKE! Hahaha... There are probably plenty of tutorials of what you want to do via the web. It's insane how many people have posted about their crafts. Thank goodness for that!  I have saved so much money making or painting our own things. It is hard though, when you may not have time on your hands. Thats why I recommend THREE Months of planning. It will help you mold what to buy around your budget.  Within the FIRST out of the THREE, be sure to have answered all pending questions and the perusing has begun, by the SECOND month out of the THREE be finalizing all purchased decor and supplies for handmade decor.  As you get to the end of being TWO months out, be sure to be at least  halfway done with your handmade decor.   So lets recap...

RECAP OF DECOR THREE TO TWO MONTHS PRIOR TO CELEBRATION/ EVENT:
  • (3 Months Out) Peruse home stores, craft stores, websites.
  • (3 Months Out) Begin purchasing decor (the sooner for ONLINE PURCHASES, to avoid rush orders and spending more money).
  • (2 Months Out) Finalize Purchases.
  • (2 Months Out) Be as close to finish with any handmade decor.

Here comes the tricky part, on top of decor, you need to finalize SWEETS!!!

        Again 3 months is helpful. Planning and execution, can be done on a shorter time frame, yes- but we are going for STRESS FREE SMOOTH COASTING! So again, THREE Months prior, peruse your favorite local shops and vendors, website for inspiration and figure out what showcases this celebration/ event. Desserts are the hardest dishes on the menu, it's no different for your dessert table. Ask yourself, will I be making the desserts? Do I want to make all, or showcase one or two of my favorite  dessert dishes to my guests- OR IS IT TOO STRESSFUL AND LEAVE IT UP TO MY VENDORS? Thats a tough one. There is something sweet and personal when you have showcased your DIY: ANYTHING. It's a chance for your guest to see your creative side and charm. Just keep in mind, who will be setting up the desserts table? Will I have help? Will I get a chance to breathe?  I'm fortunate to have my mom and sister on the, CARO'S CONFECTIONS, team. It does make it easier knowing that the people i'm working with have experience, appreciation, and an eye for aesthetics.  I'm sure all of you have a family member or friend that shares these qualities. :) ... Back to planning sweets. My sister is great about printing photos of what we plan on ordering or making. This is also great for the decor as well. I'm a hands-on kind of gal, and I cant stand looking at my smart phone or computer all day long. So PRINT if you can, organize it in a stylish folder and look like a professional party planner ;) lol. Why not?  
    
      BEFORE ORDERING:
     Lets talk about people attending and location, some think if you have 50 guest, that you should have 50 of everything. Thats a pretty intense  amount of sweets. I tend to take off of each amount of items, lets say if I have 50 guests, then I will have 5 types of sweet and quantity of 30/35 [ enter sweet here].  That's a 150/175 sweets on a table. I personally think thats enough for people to leave home with sweets ;).  Next, ask yourself, at the location, what area in the location, and what tables will be provided. Will you display all of the sweets or refill bowls, baskets, trays as the event progresses. Sometimes you don't need to put it out all on the table, and you and your go to helper can put out more later on. Plus this is great for when space is limited!

     You are ready to order? Well start calling and book those orders, some independent vendors and local shops will have different requirements when placing orders, time frame, deposits, ect. It's best to wheel your orders out as soon as you know what you are going to have. 

      Are you baking? Well congrats to you on this extra tedious and timely manner- Know what, and when certain baked goods are perishable. Sometimes you even have to make them the week, a few days, or worse- 24 hours before the party. Know what works for your schedule! PLAN PLAN PLAN!

Also, are you picking up, or having things delivered? What do they charge? How early can you pick up your items?

Depending on your vendors, do try by a month before the celebration/event, to have all your orders in!

RECAP ON SWEETS THREE TO TWO MONTHS PRIOR TO CELEBRATION/ EVENT

  • Print out images, with flavor profiles your ideal sweets.
  • Decide on vendors, and/ home baking.
  • Place your orders.Plan pick-up/delivery orders accordingly.
  • If you are baking, plan it out on your calendar.
  • Pick up or be available for Delivery orders.


 NOW COMES THE RUSH

 You know what I'm talking about, the "Oh my goodness the party is just weeks away!" The next thing you know you are recreating the same hand and facial gestures as the infamous "The Scream" painting, a la Van Gogh, or maybe you are like me and are overdosing in Starbucks coffee's and cafecito's . I would I.V. it, if I could.
    DON'T FRET. If you are following the time line this next month can be useful to tie any loose ends. Something I like to do is make a 'Mock Table'. It's very helpful and will help you see and give you a chance to fill any blank questions.

    I like to have height in mine, different fun levels to give the table some depth. Figure out what trays,bowl, crates ect. for the sweets to go in. Different cake stands and decorations of different heights, including flowers and candles. As I set the table up, I evaluate each placement, take a photo and switch things around and repeat. Then take that moment to step away and look over the photos. What do you and don't you like. Is it clean, messy, an organized hodgepodge of items? Should I add or take away anything?

      The key is to do all of this as early as possible, so you can tweak it to your hearts content, and as you receive decor orders and any other last minute decor add ons, along with sweets orders you can add them in.  Once again, keep in mind the location you are having your celebration/event in, the size of table and whats available surface wise. TAKE CLEAR PICTURES  of your 'mock table' so you have a guide for the day of the instillation. Be sure to request (if possible) a 2 to 3 hours for set up- IN ADVANCED. Not all venue's allow this, but it doesn't hurt to ask. Be sure to make a check list of everything you intend to bring, make sure you mark or write down what you own.

     EMERGENCY TOOL KIT: Be sure to have tape, scissors string, hot glue gun, safety pins, and any other pressing tools... THIS WILL SAVE YOU!!! Anyone helping you that day? Be sure they are on the same schedule as you! Provide them with coffee, hugs, and kisses- 4 shots of expresso iced latte and I'm one happy camper!

   The day has come, and the hours are flying..... are you ready? On your mark get set--- GO!

     Whip out that check list, have the pictures ready, load up that car(s), pack your emergency tool kit--- AND BREAK A LEG!!!
  
      Number one thing on my list post celebration/event, a glass of bold red wine with my feet propped up. I hope this little timeline "cheat sheet" will help you plan your future dessert table. <3

            Cheers, Post, Zalute,
                                  
                                    Caro

P.S. Below are pictures of the most recent Desserts Table my team (mother, sister, and honorary member, Lynda) and I created for the baby shower of my nephew, Michael (who's due date is Oct. 8th!). If you have any questions, feel free to message me, thanks.

Barley & Swine
Welcoming Staple


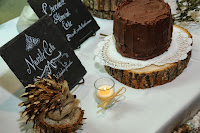
Cakes, Chocolates, Cookies, and more.


Hand Painted for 'Rustic' feel.


Wooden Letters were covered with yarn and accent button were attached.
Vintage Teddy Bear Center Pieces. 
Even decor for the rustic bar.
Close up.


Tuesday, September 24, 2013

CELEBRATING YEAR ROUND WITH, CARO'S CONFECTIONS.


  CELEBRATING AT A GLANCE!
        
    You know I never realized how rewarding it is to supply celebratory staples for families, friends and their loved ones. Year round celebrations of all types are happening, and with recommendations from the gift of word of mouth, Facebook, or my clients guest at their parties- It always still surprises me and thrills me when I get to do a new confection project for someone. You got to see some of my cakes and confections, from last Fall. Halloween weekend marked the beginning of rehearsals for musicals and filming for a few indie shorts I worked. Finding time to book clients wasn't easy, but was able to take on as many projects as I could. So here is a recap of some 2013 confections thus far.

JANUARY
  • "Captain America Suit" cake. I mostly enjoyed carving the abdominal area. Some even asked" If you are, what you eat- then can I eat those abs?" hahaha. 
  • "Bow-tastic" cake. Lots of curly ribbon, glittered confetti and of course a giant bow.
  • Macarons of all kinds.


 FEBRUARY
  • "Fireman Graduate" cake. Was honored to make this cake for our hero's of today.
  • More macarons, and even some lovely heart shaped shells for Valentine's Day.
  • "Valentine's Cakes for Two". My first bulk order of cakes. This was a monster project for me. Had over 25 orders. I learned a lot in this process. Thanks to my mother and sister. I survived!
  • "Hunger Games" cake. This was just fun. I'm really into any type of fantasy cake, it really is the most fun for me. This golden bird was done by hand, and felt really proud considering iI had no idea where to start with it. 
  • My mom helped finish off the flames as I built the golden topper.
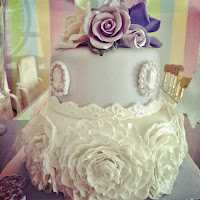
  • "Vintage Tea Party Birthday" cake. This was for my sisters 30th surprise birthday cake. That bottom tier took the longest, but fondant frilled like that, looks so lovely.


MARCH


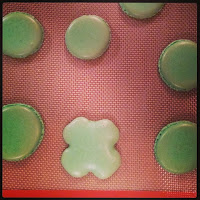
  • Macarons, yet again. Playing with the shamrock shape. 
  • "Golf Lover" cake. Simple, but still had enough detail. Loved the glittered flags.
  • "Circus Tent" cake. This was for an amazing charity called "Birthday Fairies", a friend of mine, Casey, created a branch here in South Florida, it's such a sweet story on how this amazing organization came about. For more info please click HERE
  • Here is a simple buttercream cake, adorned with mauve florals. I love florals with black centers, here we have , anemone's, and since this birthday lady is very chic, it was my go to color and flower!
  • "Safari Jungle" cake. This mother planned the sweetest first birthday for her son. She wanted buttercream for her guest and whatever fondant pieces for decor- so with that I went to town. I'm obsessed with these giraffes.
  • "Red Rose Flamenco" cake. This cake was for my dear friend's mother. The love of flamenco is vibrant in that house, and she wanted to make it extra special and personal. 


APRIL
  • "Christening" cake. I just got SugarVeil, and my client loves simplicity in a very classic way. She wanted all buttercream, white with just a hint of baby blue. To keep that delicate nature, I used the SugarVeil lightly and it had a very nice effect on the cake.
  • "Lace Crown" cake. This cake was for my niece's first birthday, it fell in the middle of the week and her actual party wasn't until the weekend. Though things were crazy, with all the last minute 'to do's' I was able to whip up a mini- cake for her and the parents. It's only tradition for a cake and candle on anyones birthday. 
  • "Circus Elephant" cake. So many types of circus animals to do, and even with an elephant I couldn't decide what to do. Sometimes, you just have to trust yourself and see what comes out! All I know, is I wanted big floppy ears, and this lil girl had em.
  • "Circus Cupcakes". We did 'popcorn','sundae', milkshakes, and randoms.
  • "Taurus Brownie" cake. I don't get this, explain to me the person (in this case a guy) that prefers vanilla on vanilla cake, BUT loves CHOCOLATE? lol. Gotta love 'em. Brownie cakes have become popular orders for me since then!
  • "PINK-GREY" Wedding Cake. This simply yet floral time consuming cake, was used for a " PINK GREY VINTAGE CHIC" wedding photo shoot, that I was very happy to be a part of  by, Liz Dikinson Photography. It was later published in several bloodspots and magazine articles (more on that later). 


MAY

  • "Burlesque" cake. This bachelorette party had a spicy theme for their ladies night out, and I was all game. I prefer this kind of cake versus the raunchy, well- you know...
  • Lots of desserts for treats tables, cupcakes, tea cakes of all flavors. have you seen my menu? Click HERE
  • "Betty Boop Kisses" cake. This client had their very own Betty Boop topper, and wanted a complimenting cake for it. Check out these sweet kisses.
  • "Lady Bug" cake. The most important and hardest decision for me, was her face. She is indeed a, lady.
  • "Vintage Tea Bridal Shower" cake. the setting once again compliments the cake. I really enjoy this life sized dollhouse. For more info on Veronica's Dollhouse, click HERE.


JUNE
  • Could not book clients due to back to back 'LOCAL & OUT OF TOWN' show runs until mid August.
   AUGUST
  • "Superman" cake. This adorable 4 year old the coolest invites!!!
  • "Dad" cake. I call these the "Dad" simply because it was for my father, and he loves a classic vanilla bean cake with chocolate add ons anywhere. So before I headed off to rehearsal, I whipped up a 'Judy Garland' cake with on add on of chocolate morsels and milk chocolate ganache. With a simple banner and candles, it was there waiting for him. Don't worry there was a piece waiting for me when I got home. ;)


SEPTEMBER
  • " Rustic Baby Shower" cakes. Oh, yeah by the way my sister is expecting! This time a baby boy. So many events happen before fall, that it's crazy to think you will every get anything done!  Somehow, some way between my sisters work, m


       Hope you all enjoyed some of my confections from this past year. Looking forward to many, many more. Stay tuned for post on my recent dessert tables and treats provided for my clients, also tips on how to prepare and decorate dessert tables, until then...

Pinkies Up,

    Caro